Jig setup
Jig setup and the wrangling of long lvl members was as arduous as imagined.
After attaching the ends of the lvls to 4x4 corner pieces, the roughly assembled frame was lifted onto temporary end supports made of 2x4 and plywood shelves, allowing corners to be raised and lowered to achieve approximate level.
Reversed quick clamps were used as makeshift jacks to facilitate leveling until 2x4 legs were temporarily secured.
Pressure-treated lumber will be used to make permanent legs and ground plates. As the legs are installed, a laser level and tape measure will be used to make the jig as level as possible. Cross members fastened diagonally between the legs will resist racking.
The jig will be measured diagonally to determine square, and a come-along or other means of persuasion will be used to correct squareness. Plywood gussets attached to the top of the jig and diagonal cross-braces should maintain square.
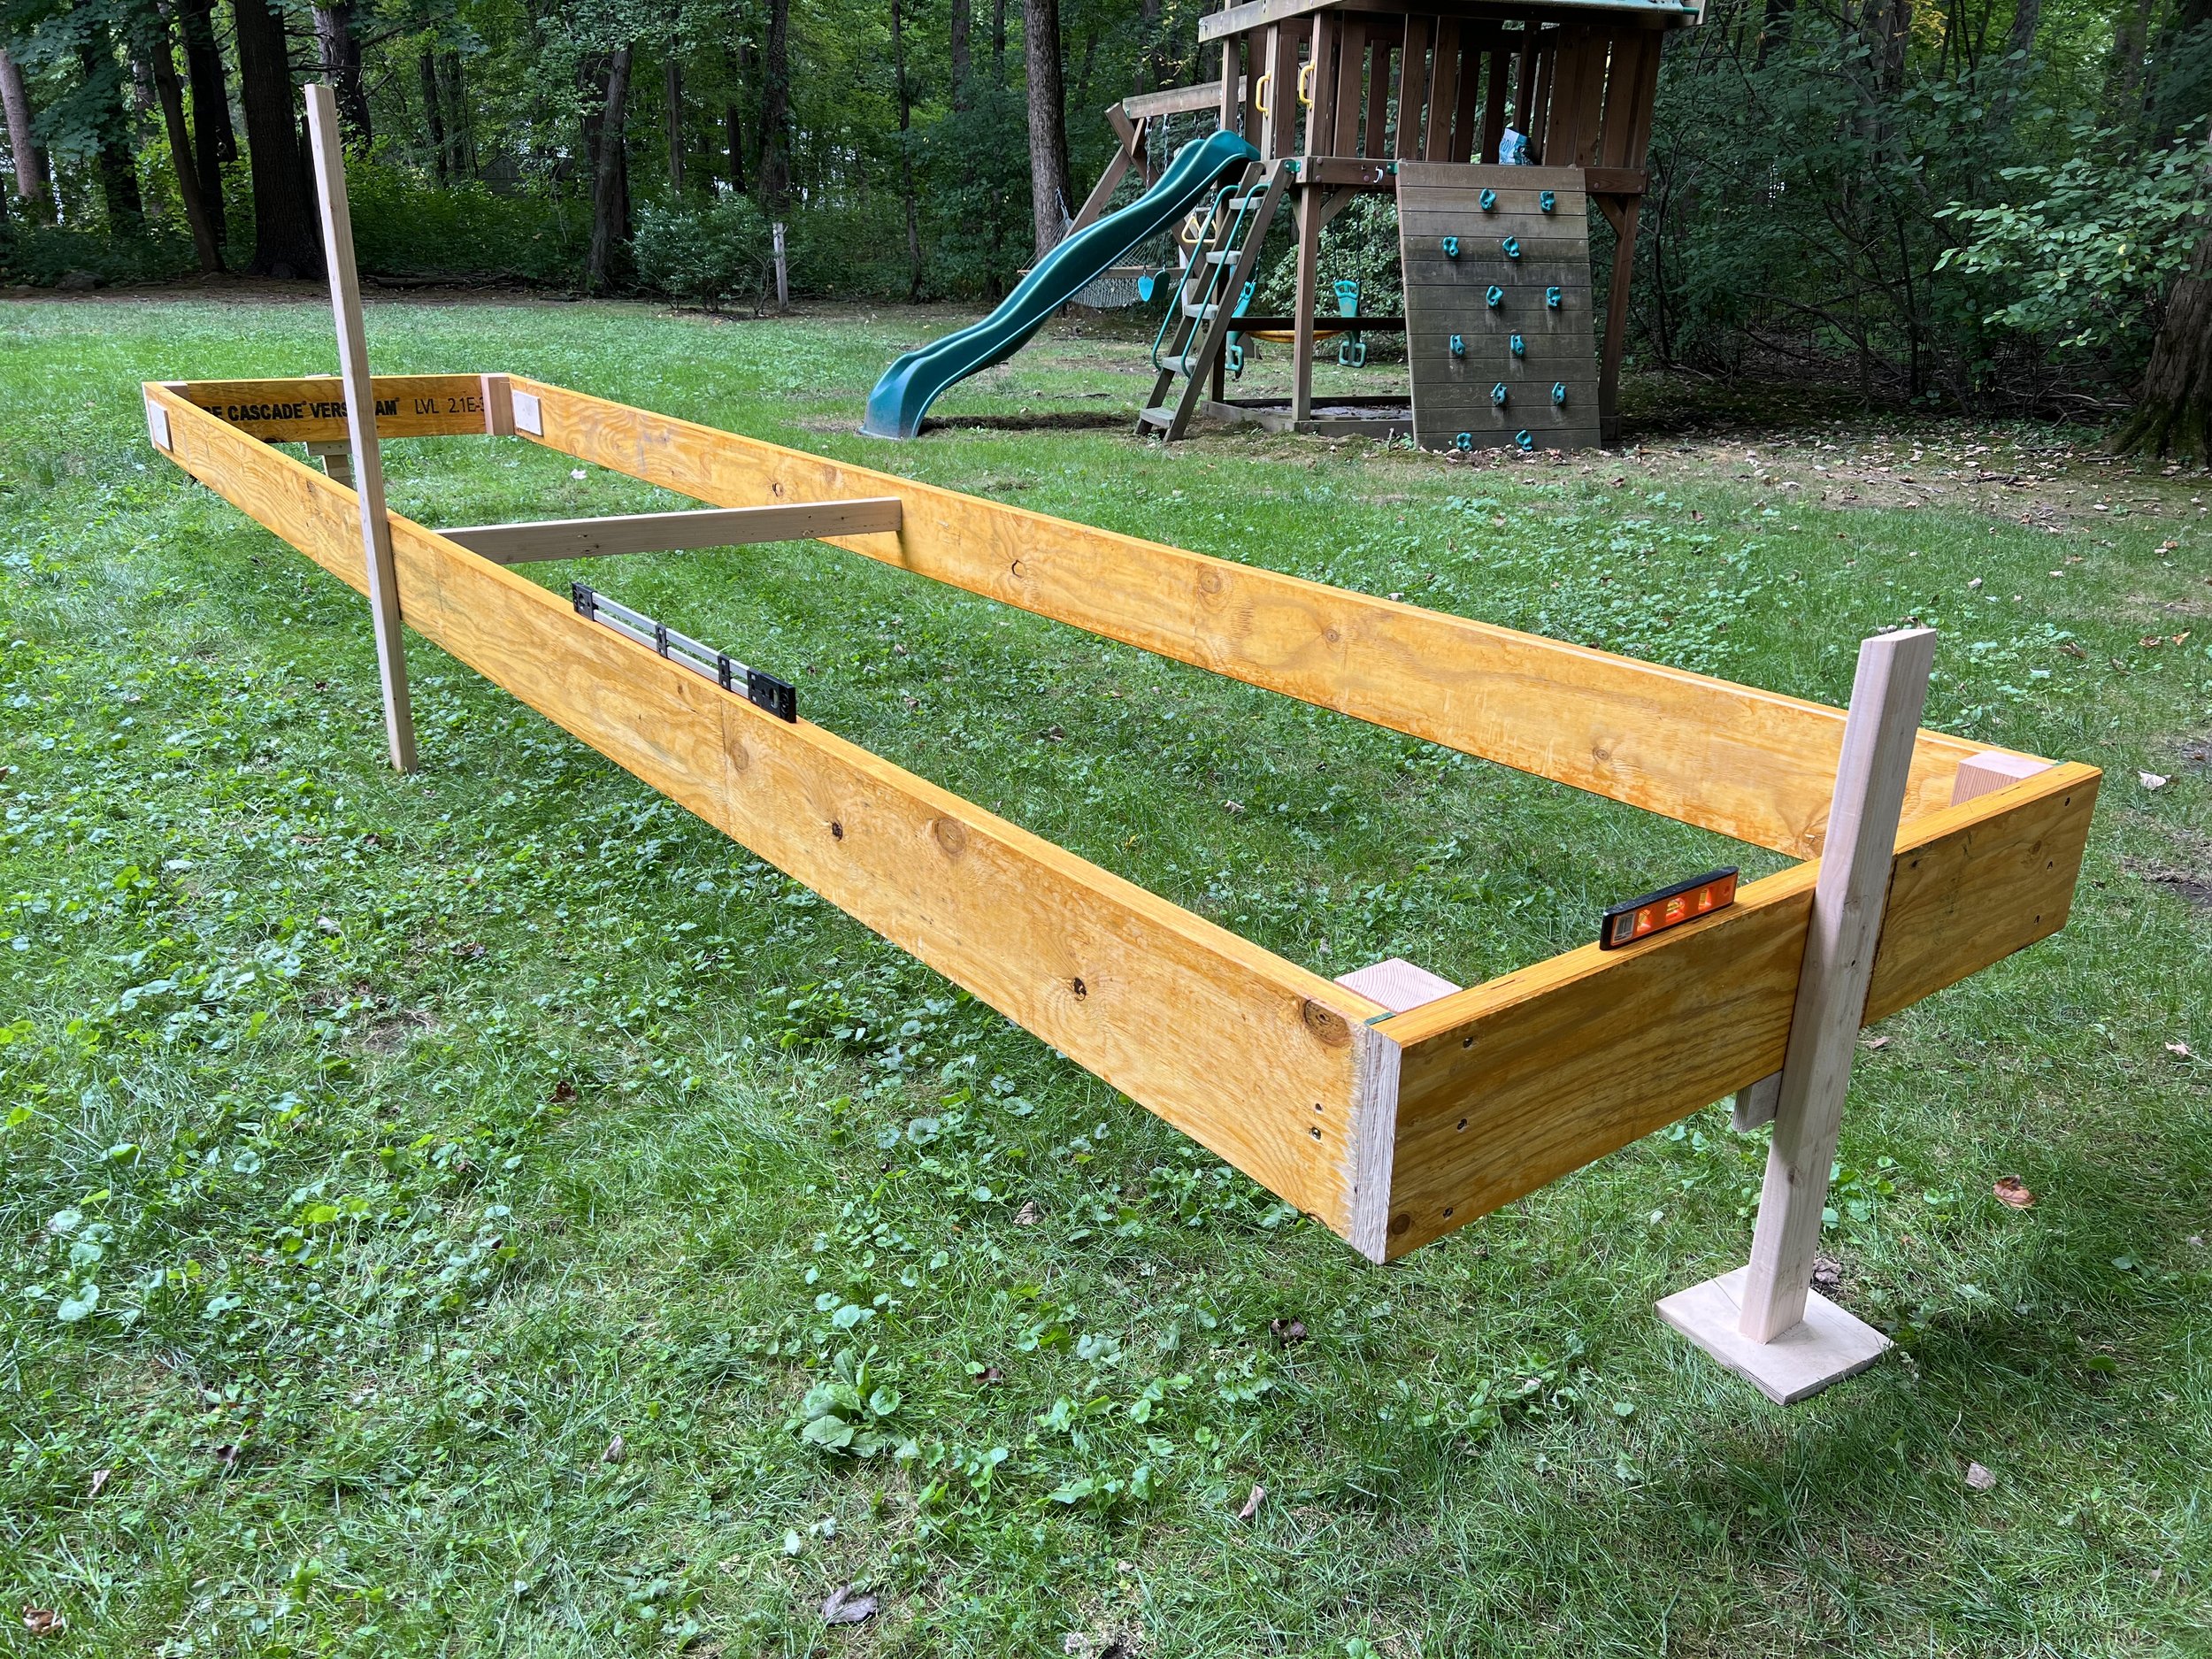

The roughly assembled jig on temporary end stands. The lvl extensions are visible on the side of the jig facing left.